6 Keys and Best Practices to a Seamless HubSpot Salesforce Integration
HubSpot and Salesforce are two extremely powerful pieces of a company's tech stack, and getting the most out of both systems requires a sophisticated strategic approach that leverages the strengths and limitations of both platforms.
The details of your specific setup will depend on numerous factors, including your teams, your processes, and your experience using each system. While there is no magic formula for confiuring your integration, reliable data is a must.
Focusing on these six key areas will ensure your integration provides marketing, sales, and customer success / service the right information and accessibility required for success. It's essential to get these right!
1. Managing Lead Intake and List Imports
Most organizations maintain Salesforce as the source of truth between your databases, but that doesn’t necessarily mean you will be bringing in all of your leads via Salesforce. In fact, many teams opt to import contacts via HubSpot, taking advantage of the deduplication engine that matches based on email address.
Regardless of where you bring in leads, right off the bat you will need to determine what the default object will be in Salesforce, a lead or a contact. This is currently a limitation of the native integration tool, and you can only select one default object.
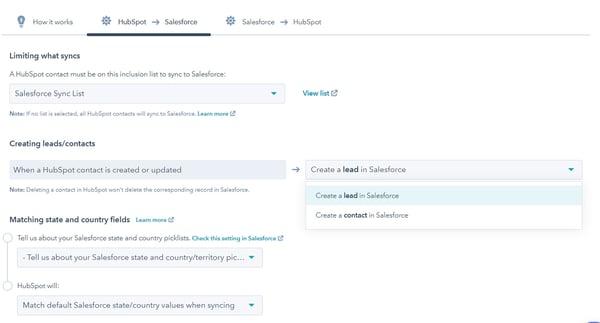
If your sales process includes a step to validate/qualify leads, then you will want to create new leads in Salesforce whenever a new contact is created in HubSpot, and then let your sales team convert the lead as part of their qualification process.
The Salesforce integration settings in HubSpot allow you to independently select if you want to create a new HubSpot contact when Salesforce leads or Salesforce contacts are created. You can enable these independently, but in general we recommend that this is turned on for both object types.

You must also determine what happens when Salesforce leads and Salesforce contacts are deleted. Most likely, you will also want to delete these in HubSpot if they are being removed from Salesforce.
2. Mapping HubSpot Properties to Salesforce Fields
Syncing HubSpot Contact, Company, and Deal Properties with Salesforce Lead, Contact, Account, and Opportunity Fields
HubSpot contact properties are easily mapped to Salesforce lead and Salesforce contact fields. The same mapping also exists between HubSpot Company properties and Salesforce account fields, as well as HubSpot deal properties and Salesforce Opportunity fields. There are four different update settings for most properties (a few properties have some specific sync rule limitations):
- Prefer Salesforce unless blank
- Always use Salesforce
- Two-way
- Don't sync
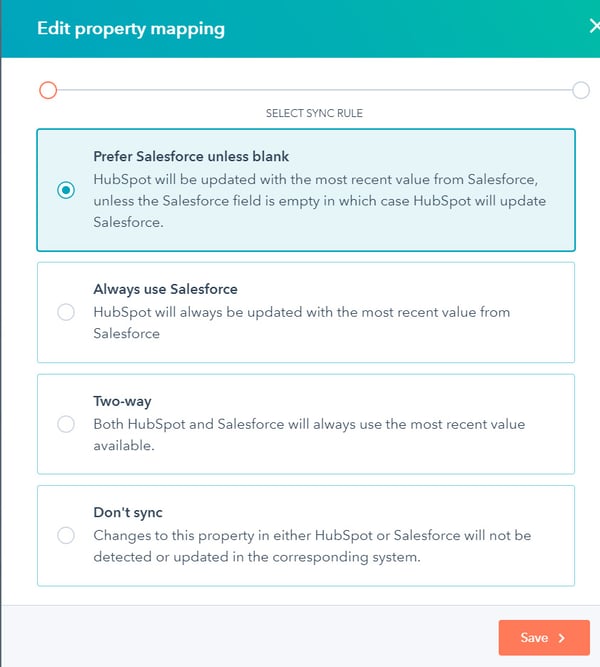
These rules are fairly self-explanatory. For most properties and fields, you will want to use the “most recent value” setting to keep all information in both systems as up-to-date as possible. Of course, there are plenty of exceptions, but use this as a general guide.
Another tip to keep in mind, is that it is always better to use a drop-down select or radio buttons instead of an open text field whenever possible. This is particularly true when managing multiple contact databases and CRM systems.
It is also important to use clear and consistent naming conventions so that any team member can understand how a property is used. HubSpot will create new options automatically when options are added to a drop-down field type in Salesforce.
Finally, remember that contact, company, and deal workflows can be combined and utilized together to provide functionality not possible with a single workflow type. This allows you to get creative with your lead management and reporting by transforming your data in HubSpot before sending it into Salesforce.
If you have created custom objects in your HubSpot portal, these records and properties can be synced to custom objects in Salesforce.
3. Inclusion Lists and Selective Sync
HubSpot utilizes an inclusion list as a means of limiting and managing the contacts that can sync between HubSpot and Salesforce. Any list can serve as your inclusion list, and it is enabled and selected from the Salesforce integration settings in your HubSpot portal. Some common practices are to prevent internal team members and competitors from syncing to Salesforce. Many teams also prevent top-of-funnel leads from syncing until they are more sales ready. Depending on your audience and organization, you may have other groups you want to exclude from your sync.

Your company’s lead to contact conversion process will play a major role in determining the criteria for your inclusion list. We recommend managing multiple groups of contacts separately in individual lists, and then combining these into a single “Master Inclusion List.”
On the Salesforce side, you can set up a feature called selective sync. This involves setting a user or role that acts as the gatekeeper for syncing with HubSpot. Only leads assigned to or touched by that role or user will be synced to HubSpot. This is the preferred method to manage contacts syncing at a more granular level. Make sure the user has sufficient permissions to write to all of your synced fields.
A simpler option is to limit either lead or contact object types from going over into HubSpot. Depending on your specific sales process this is a straightforward yet viable option for some companies.
4. Primary Reporting System
It is vital to determine your primary reporting system and build the mechanisms to capture your data.
HubSpot and Salesforce provide different capabilities when it comes to reporting. While it might be tempting to handle reporting entirely in Salesforce, sophisticated marketing teams will want the flexibility and ease of use built into HubSpot as it relates to your marketing activities and reporting - not to mention, having those reports in HubSpot can save you hundreds of clicks and copy pastes between platforms.
Ultimately, if you are conducting your sales activities in Salesforce, utilizing Salesforce campaigns will provide the greatest level of granularity when it comes to reporting and attribution. Check out this comprehensive blog on how to manage and assign Salesforce campaigns using HubSpot.
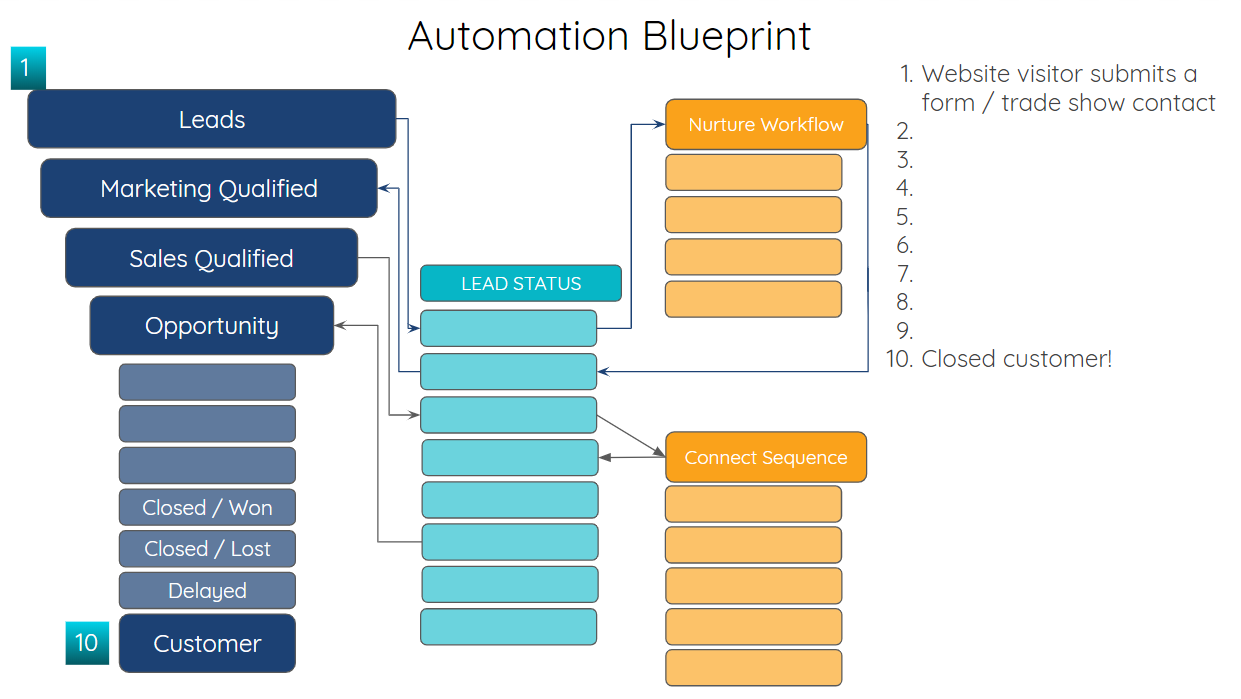
Regardless of your reporting system, clean data is the most important component - period. If you can’t trust your data, you won’t be able to make sound and accurate decisions, because they aren’t based on the right information. If you’re struggling to get clean data, start with an automation blueprint.
5. Clearly Defined Sales Process and Cleanly Executed Lead-to-Contact Conversion Process
If you haven’t already, you’ll need to establish your minimum conversion criteria and validation rules in Salesforce. These are the requirements your team will rely on when leads are ready to convert to contacts. It can be tempting to create an elaborate set of requirements, but try to keep it simple and straightforward.
It is also important to clearly communicate which team member is responsible for handling the conversions. Be sure to decide what happens to a lead that does not meet the minimum standards in one or more criteria.
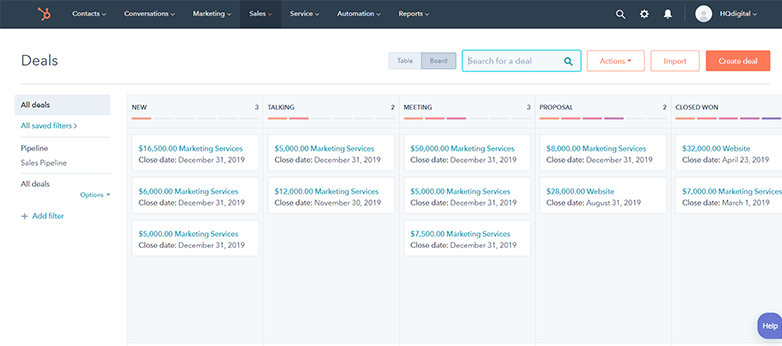
When leads are converted to contacts in Salesforce, you must either add the new contact to an existing account or create a new account to associate with the contact. This creates an underlying relationship tying the contact and account together in a way that both Salesforce and HubSpot will understand going forward. Further, the Salesforce Opportunity Record must have a primary contact associated from HubSpot. Opportunity records in Salesforce equate to deals in HubSpot, so if you assign the primary contact at the time of conversion, HubSpot will automatically mirror this relationship with deals.
We recommend developing comprehensive playbooks to ensure everyone on your team handles the lead to conversion process the same way. In addition, many organizations opt to create an SLA between their marketing and sales teams, which has a multitude of benefits. Not only does it create a sense of shared responsibility by letting your teams define what constitutes a “good lead” together, but the end result is both a more accurate depiction of your ideal customers, and a team that has agreed up front to be accountable.
6. Utilizing a Sandbox
The HubSpot-Salesforce integration allows you to connect HubSpot to your Salesforce sandbox. This may not seem like a crucial step, but making sure your data is flowing into the sandbox correctly before pushing out changes to production can save you dozens of headaches and hundreds of hours troubleshooting. Don't skip this step!
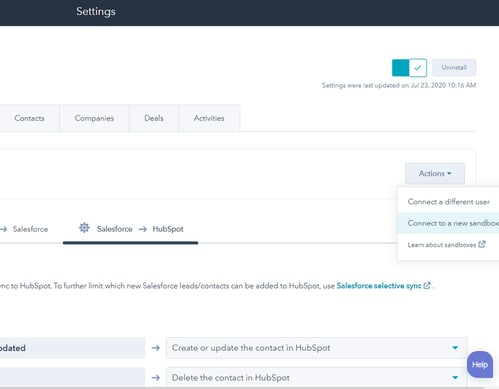
Connecting the Sandbox is very simple, and can be done in the HubSpot from the Salesforce Sync Settings Tab, under the actions dropdown menu.
You even have the ability to connect to multiple sandboxes!
Ideal HubSpot-to-Salesforce Integration Setup
If you were waving a magic wand, starting completely fresh, here is what the IDEAL marketing-to-sales-handoff process would look like across HubSpot and Salesforce. This is based on the current integration limits between the two systems:
- Lead intake occurs through HubSpot, duplicates are automatically detected and removed based on email
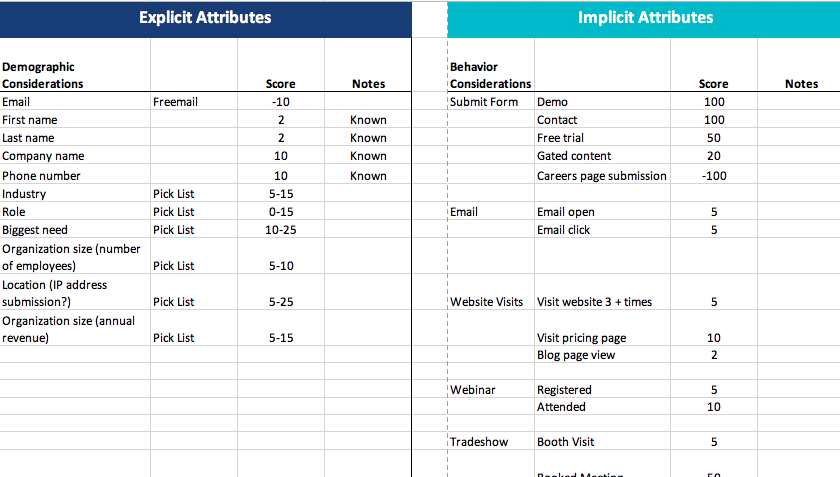
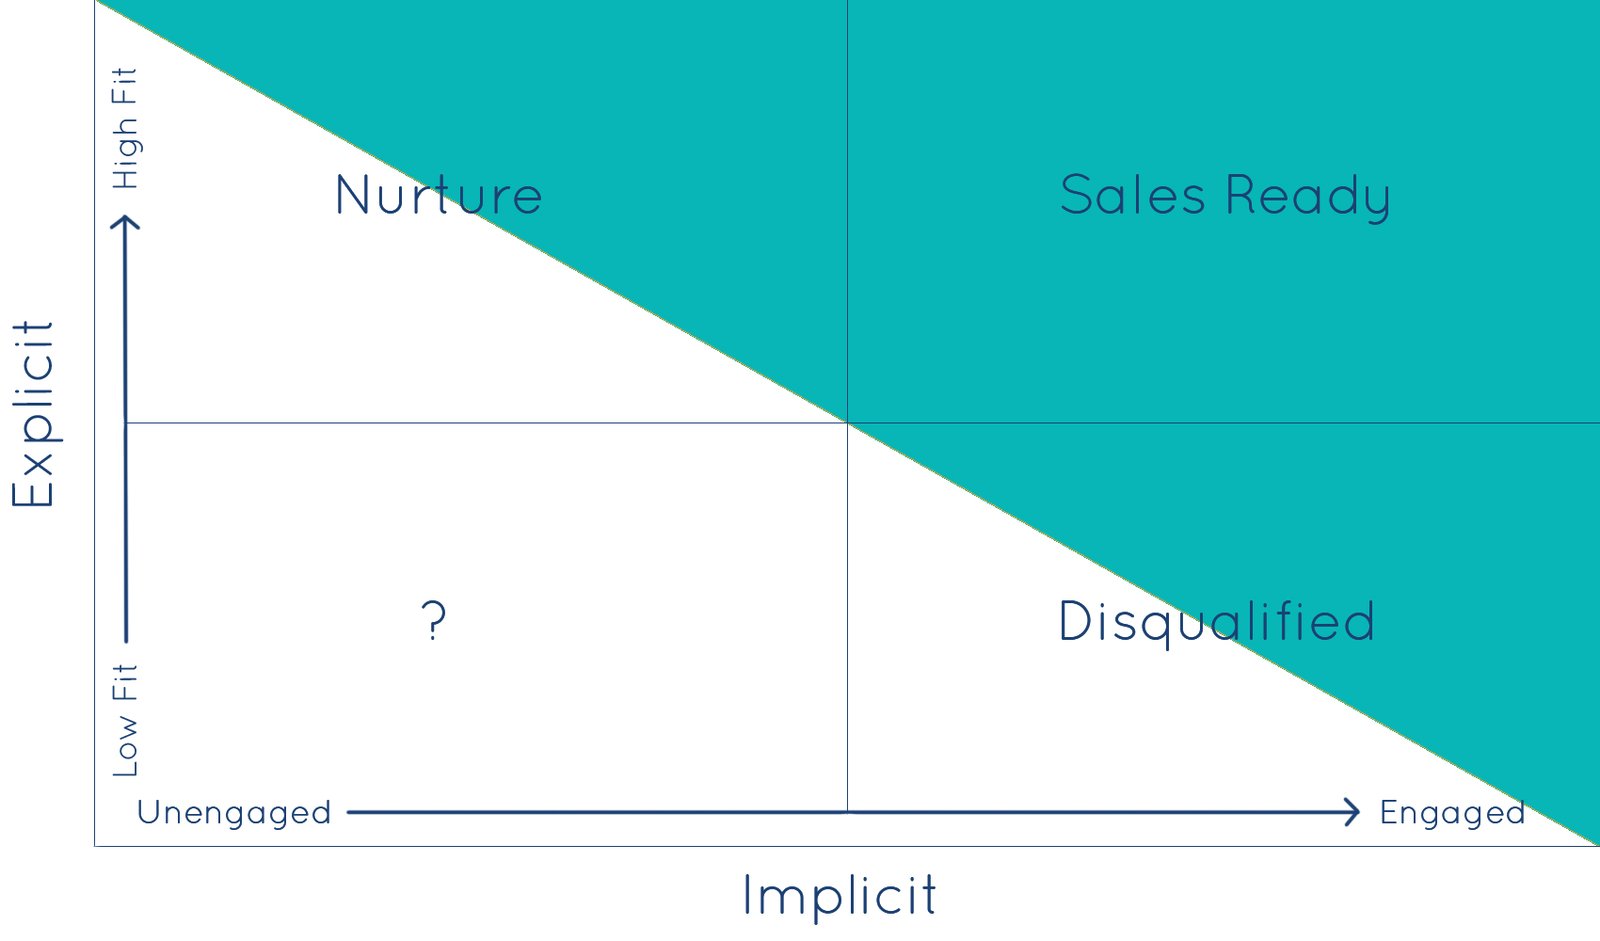
- Leads are nurtured into Marketing Qualified Leads based on lead scoring
- An exclusion list prevents subscribers and leads from syncing with Salesforce
- MQLs then sync to Salesforce as Lead objects
- The sales team accepts or rejects the MQLs
- Accepted - change them into Sales Qualified Leads. This step includes converting the lead object to a contact object in Salesforce
- Rejected - lead is either DQ-ed or stays in nurture
- Once a lead is accepted by sales and converted to a contact object, the contact can be associated with accounts and opportunities, which are synced to companies and deals respectively in HubSpot.
While this approach maximizes the capabilities of the two platforms and their native integration, a different approach may be necessary for a myriad of reasons.


